A Guide to Installing Packages in Your Salesforce Playground
Learn how to easily install managed or unmanaged packages into your Trailhead Playground with this step-by-step guide.
Introduction: Why Install a Package?
To learn on Trailhead, Salesforce provides certain packages with pre-configured data and components. These packages help you work directly on the challenge or complete the exercise without needing to make additional changes, so you can focus on learning.
Managed vs. Unmanaged Packages
- Managed Packages: These are distributed via AppExchange and include a license. They can be shared with multiple clients.
- Unmanaged Packages: These are not distributed via AppExchange and are often used for open-source projects or client-specific solutions.
Prerequisites
You will need a Trailhead Playground to follow along. You can refer to this blog post to set up your playground: Here
- Create a new playground if you don’t already have one.
- Launch the playground.
Finding the Package Installation Link
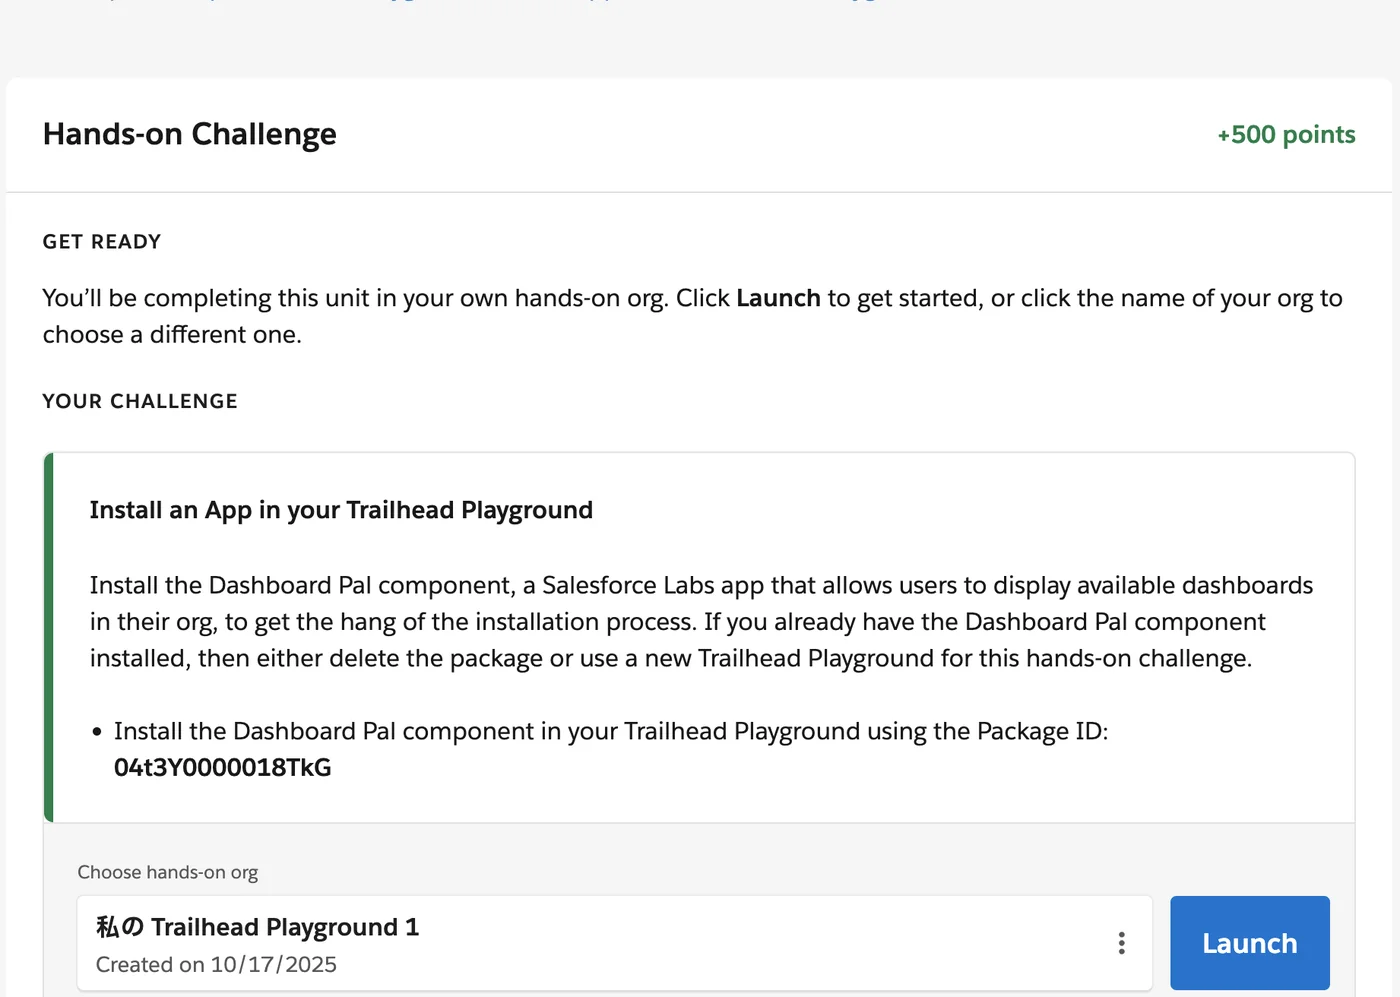
The package IDs are usually provided in the specific Trailhead module based on the requirements of the exercise or challenge. You can typically find them at the bottom of the module in the challenge section.
For example, 04t3Y0000018TkG is the package ID in this case.
Step-by-Step Installation Guide
Now, let’s go through all the steps to install a package in your Salesforce Trailhead Playground:
Step 1: Log In to Your Trailhead Playground
- You can launch your playground either from the Trailhead module or from the Playground Management page.
- Click on the Launch button.
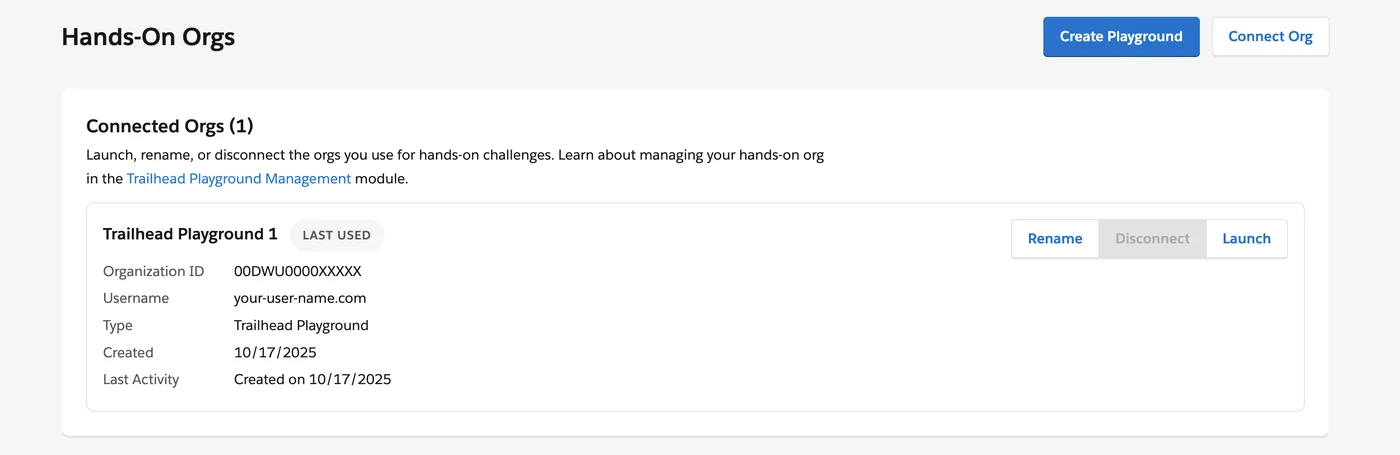
This will take you to the dashboard of your sandbox, where you can start working with your Salesforce environment.
Step 2: Click the Installation Link
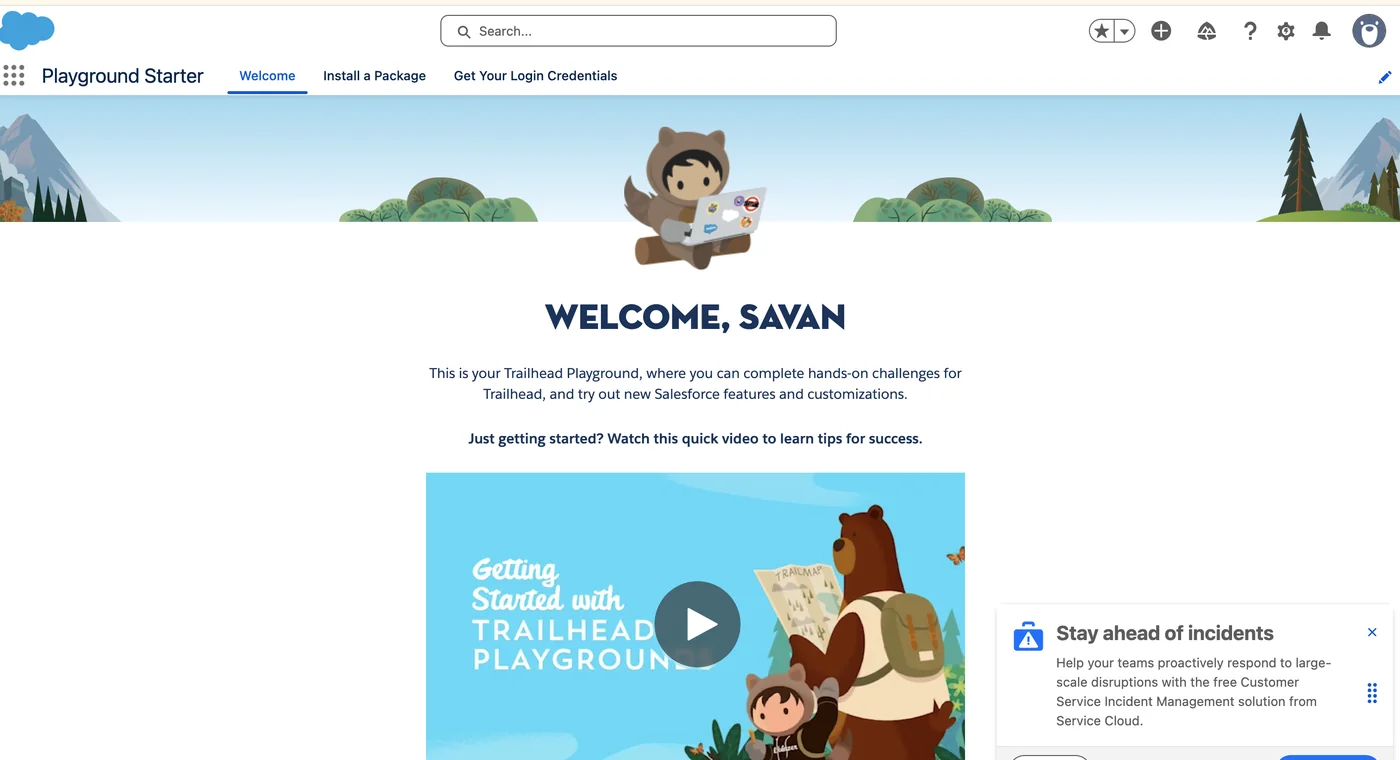
After logging in, you will land on the Playground Starter App page.
If you don’t see it, open the App Launcher from the top-left corner below the Salesforce logo.
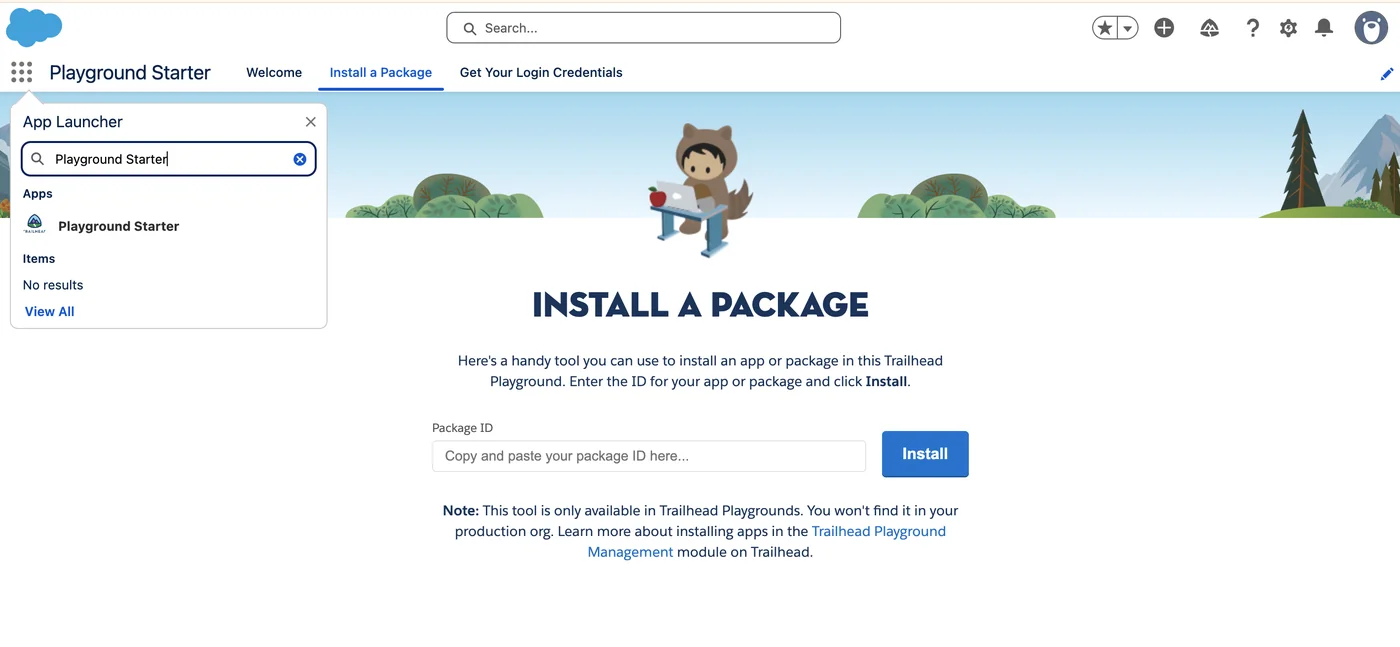
Next, navigate to the Install Package page.
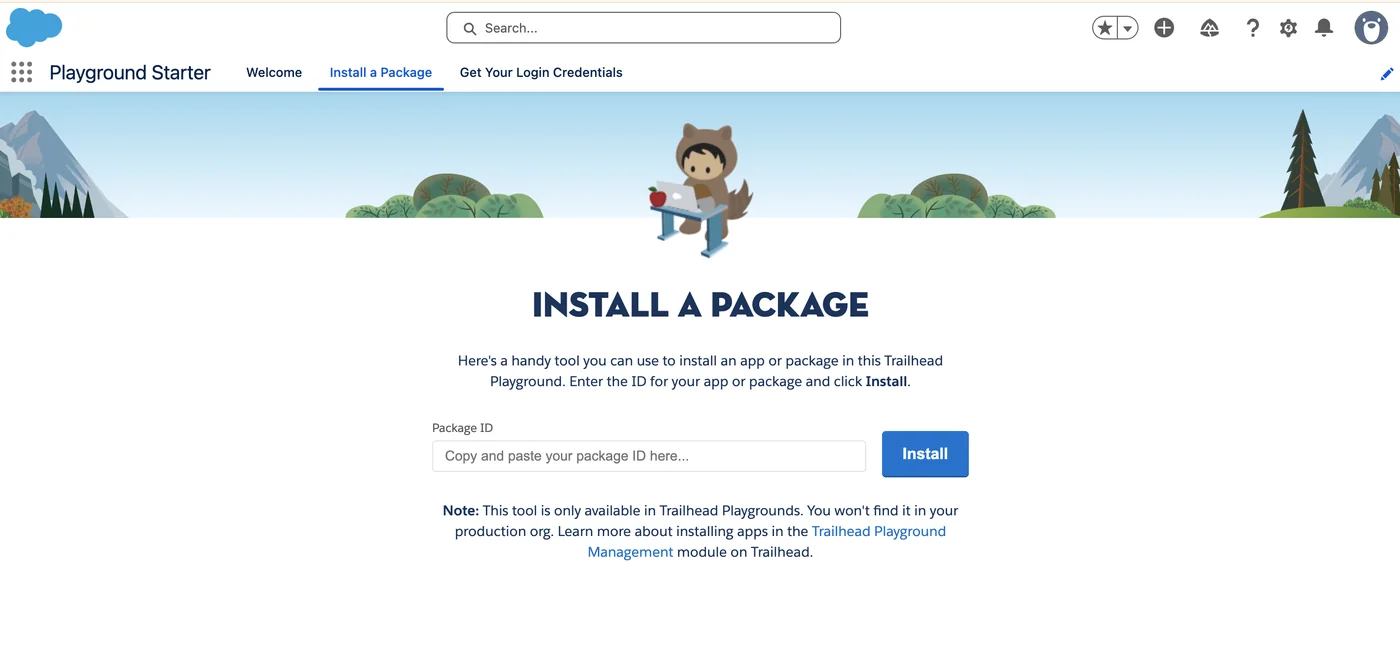
- Enter the package ID you copied earlier (04t3Y0000018TkG) into the field.
- Click Install to start the installation process.
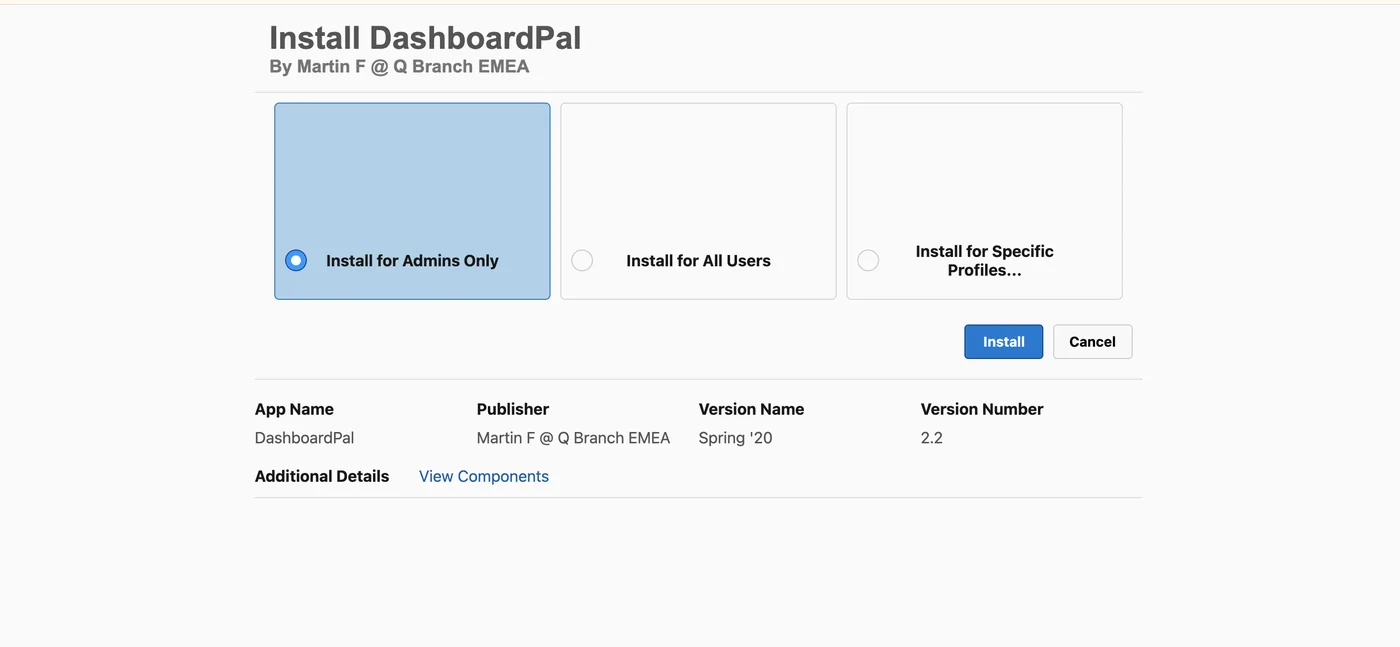
Step 3: Choose Who to Install For
- Select who should have access to the package.
- For Trailhead exercises, you usually don’t need to worry about this too much. However, in a real environment, always be mindful of who can see and use the package.
- You can always change visibility and access later if needed.
Step 4: Acknowledge and Approve
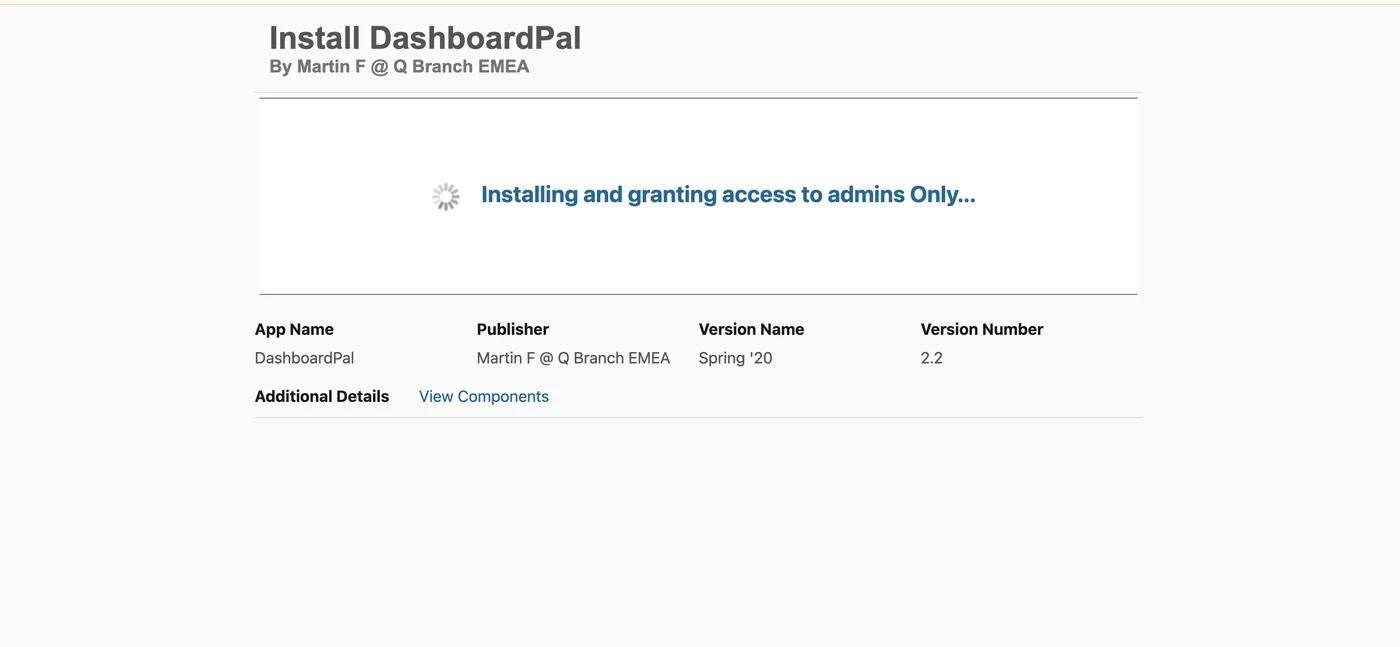
- After confirming the installation, the package installation will begin.
- The process may take a few minutes to complete.
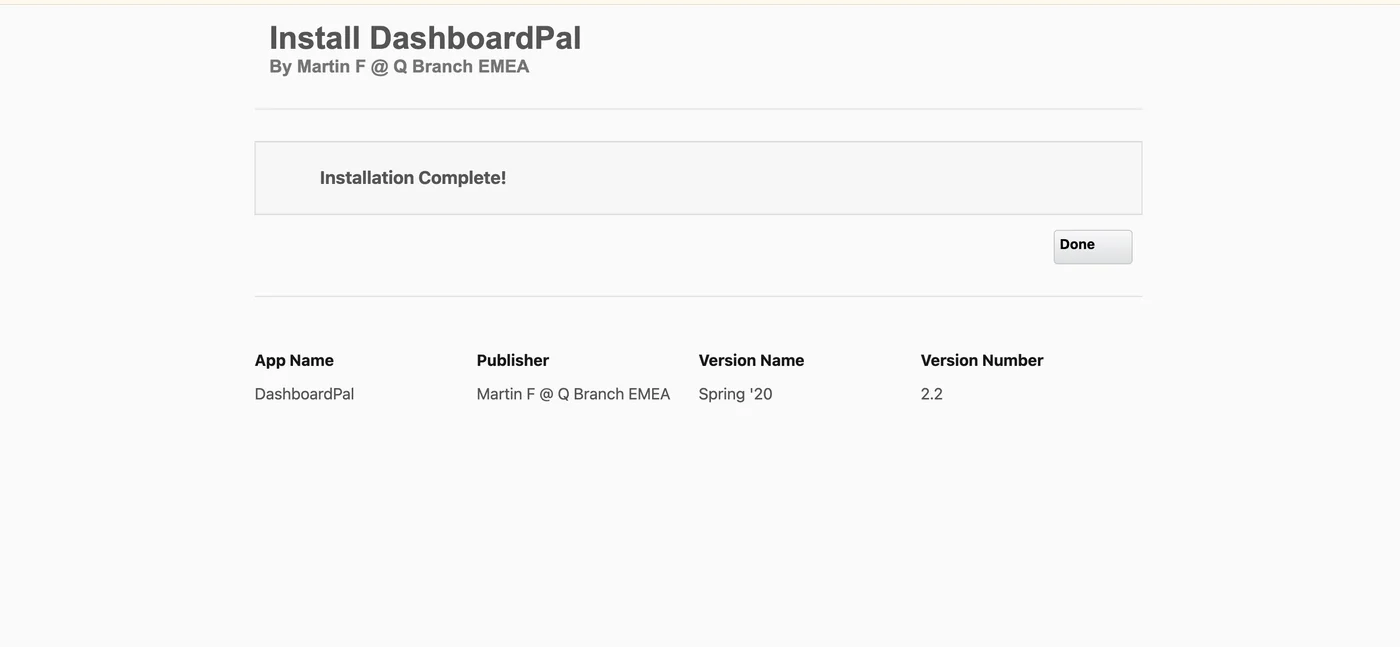
- Once finished, you will see a notification confirming the successful installation.
Step 5: Wait for the Confirmation Email
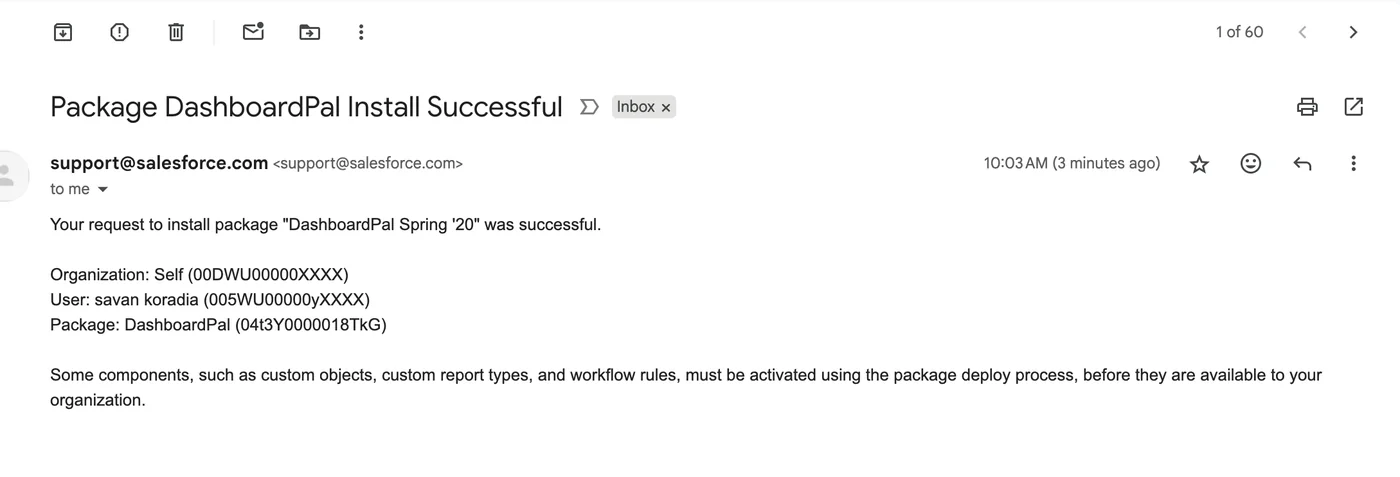
Once the installation is complete, you will receive an email notification confirming it.
How to Verify a Successful Installation
Now, let’s check if the package was installed successfully:
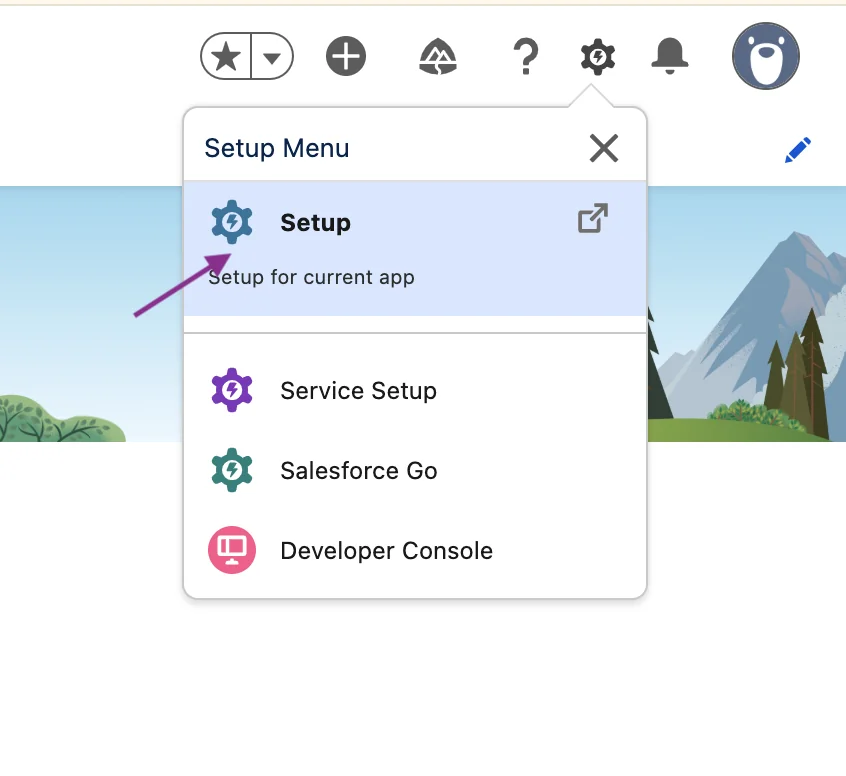
- Open Setup
- Click the gear icon in the navigation bar and select Setup.
- Search for Installed Packages
- In the Quick Find box at the top of the Setup page, type Installed Packages.
- Check the List
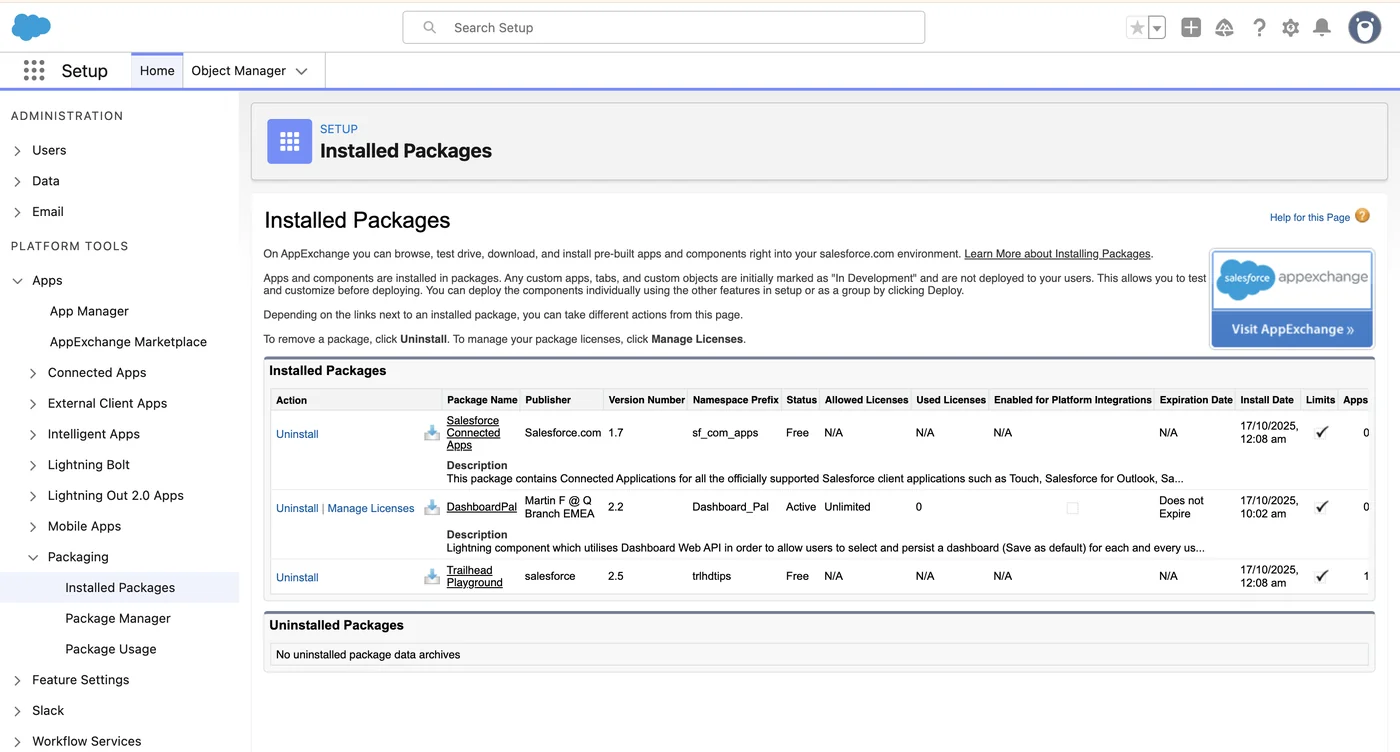
- You will see a list of all packages installed in your playground.
- Confirm that the package you just installed appears in this list.
Conclusion
Installing packages in your Salesforce Playground is a fundamental skill that unlocks a wide range of Trailhead modules and projects. By following the steps outlined in this guide—from finding the package ID to verifying the installation—you can confidently add new features and data to your learning environment. Now that you know how to manage packages, you're well-equipped to tackle more advanced challenges and continue your journey to becoming a Salesforce pro. Happy trails!
Related Links
Trailhead: Install Apps and Packages in Your Trailhead Playground
Test your knowledge
Quiz1. After launching your Playground, where can you go to manually install a package if you have the package ID?
2. How can you verify that a package has been successfully installed in your Salesforce Playground?
Savan Koradia
Architect & FounderCEO & Founder of AakarDev Softwares • Salesforce B2C Commerce Architect
Hands-on engineer sharing practical, experience-driven insights on Salesforce Commerce Cloud architecture, technical debt, cartridge health, and platform decisions from real production work.
Related Articles
Mastering Salesforce User Access: Profiles, Permission Sets, and Groups — A Pawfect Step-by-Step Guide
A practical, example-driven guide to understanding Salesforce user access using Profiles, Permission Sets, and Permission Set Groups — explained through the Pawfect Care App.
Lightning App Builder – Practical Guide
Learn how to create a custom Salesforce application, configure record types, and customize views for different teams using the Lightning App Builder.
Salesforce Data Insights: How to Use Lists, Views, and Report Charts Effectively
Learn how to manage and visualize your Salesforce data using Lists, Views, and Report Charts for better insights and decision-making.